Step 4 - Upload Content
The confirmation that you receive when you sign up for LIVE includes access codes for uploading content, including an Access Key ID and a Secret Access Key. Below is an example:
- Access key ID: SKIATBVIELD34KODRUNN
- Secret access key: GBbU/zWxpaB++9n2TtoworlNUr77G15yF68PQO0m
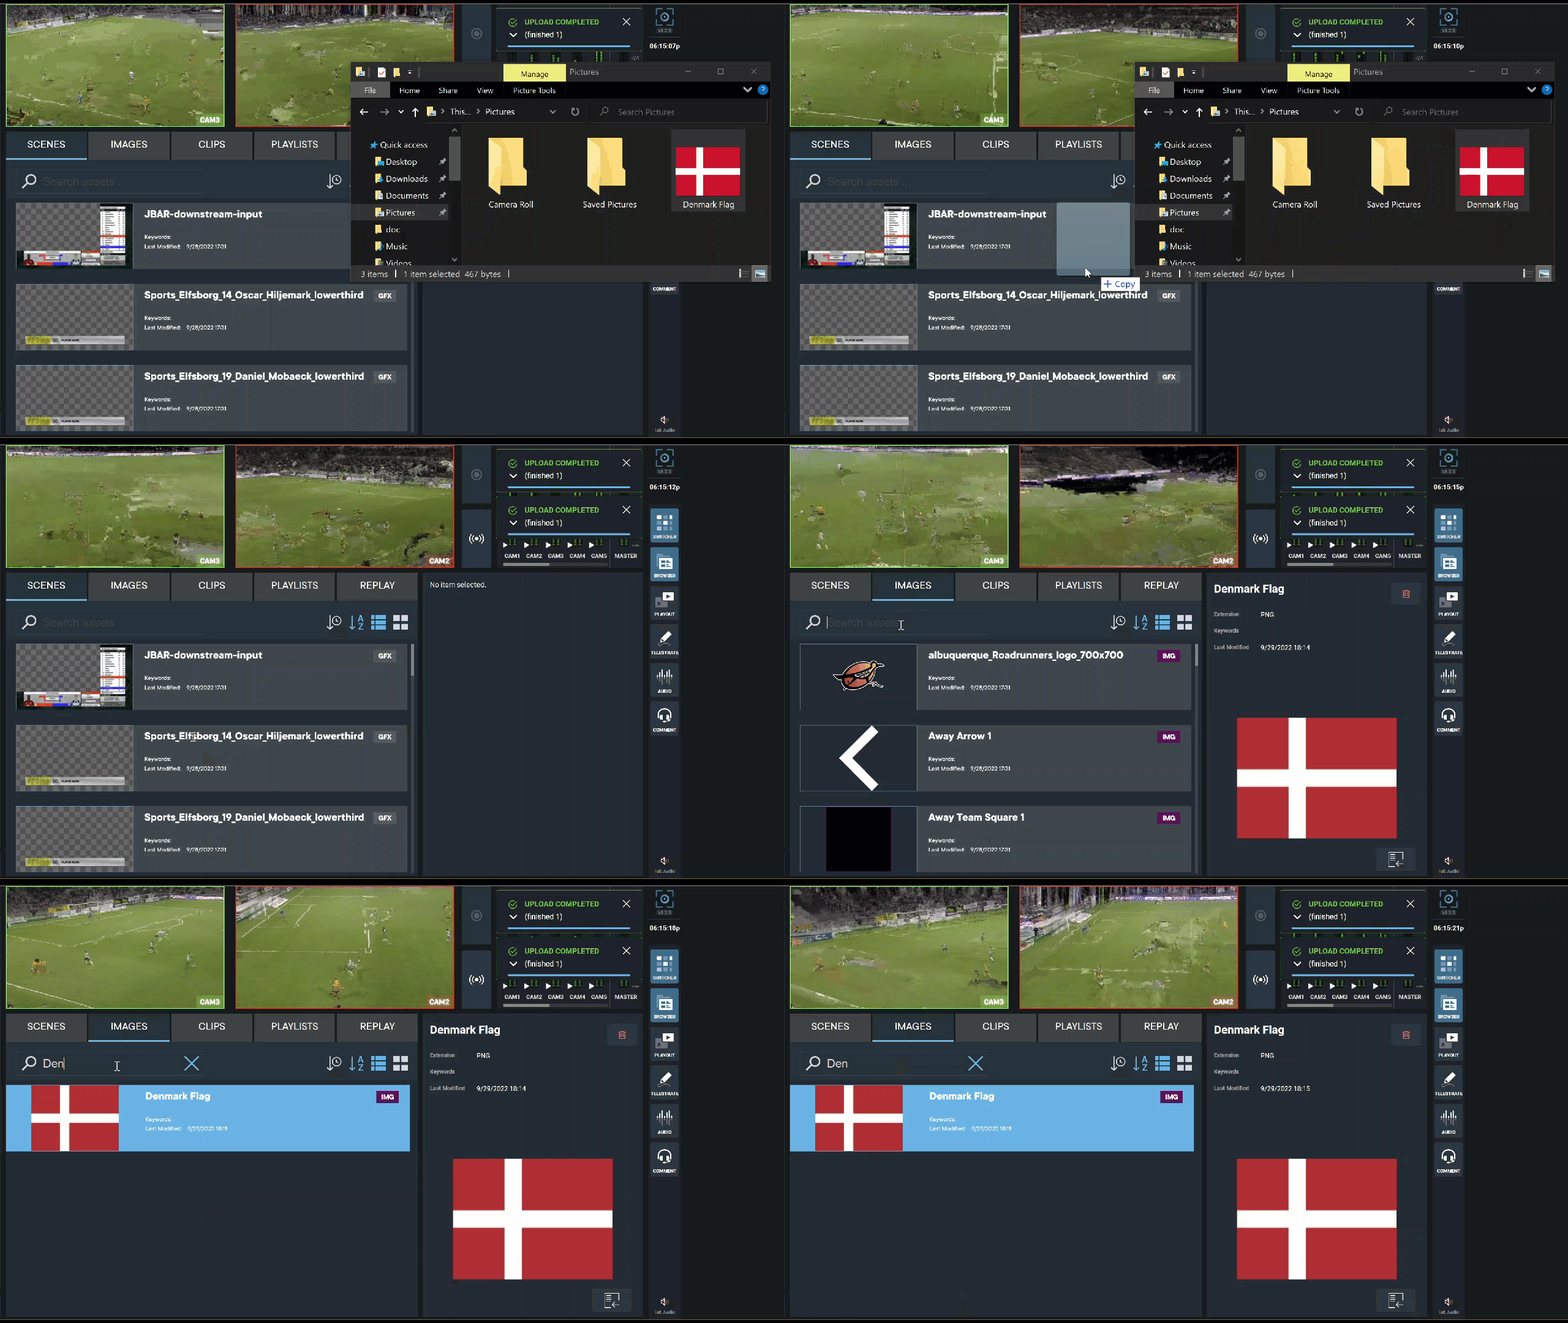
Drag and Drop feature allow users to upload files from Windows Explorer onto the LIVE Browser by simply dragging and dropping the desired images and clips.
- Begin by saving your image or clip to your preferred location.
- Drag and Drop your image or clip from the desktop file, and drop it in the Browser section.
Once the image or clip is dropped, click on the Search bar and enter the image or clip name.
LIVE 1.2 now supports two additional methods for uploading. The first is the LIVE Uploader, this is a new feature in PRIME 4.6 that allows users to upload content directly from PRIME to LIVE.
Use LPP folder to upload content from PRIME to LIVE by re-naming an existng folder to LPP, or creating a new LPP folder.
- Access PRIME main screen.
- Click Config button on top of the screen.
- Click Settings button.
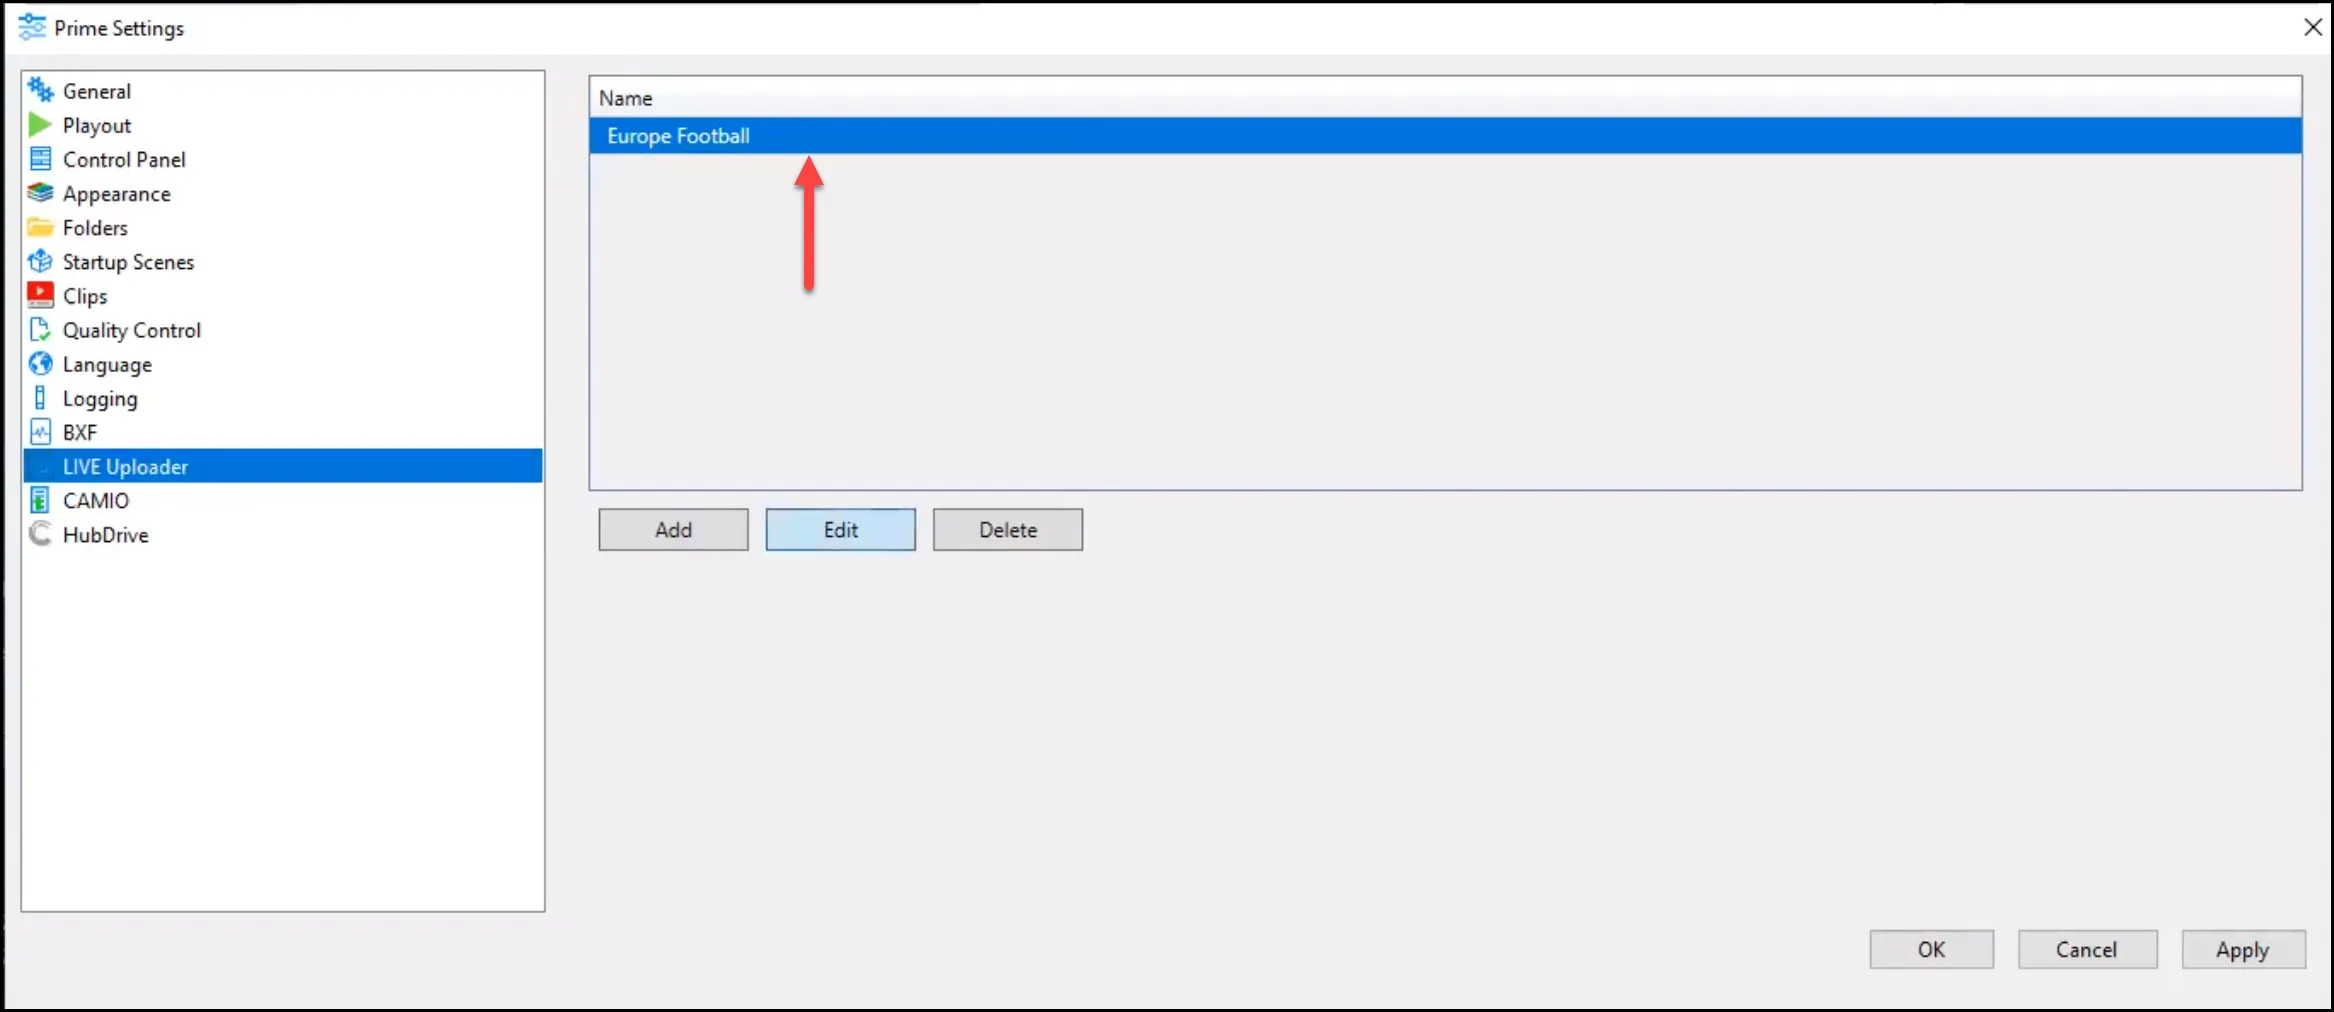
- Click LIVE Uploader button.
- Click Add button.
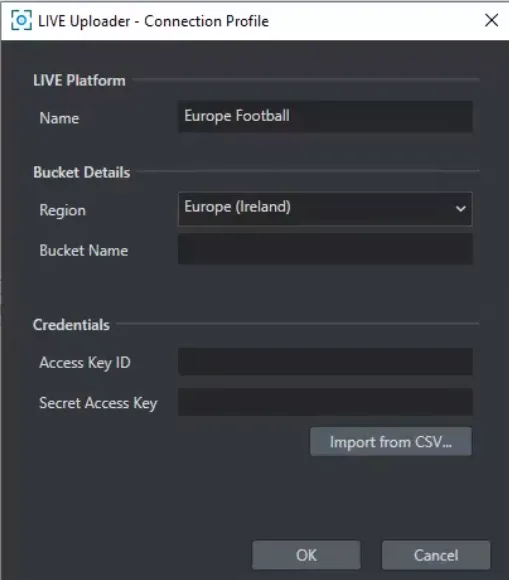
- Enter credentials, Name, Region, Bucket Name, Access Key ID, and Secret Access Key and click Ok.
Once saved, the new item will populate in the Name section.
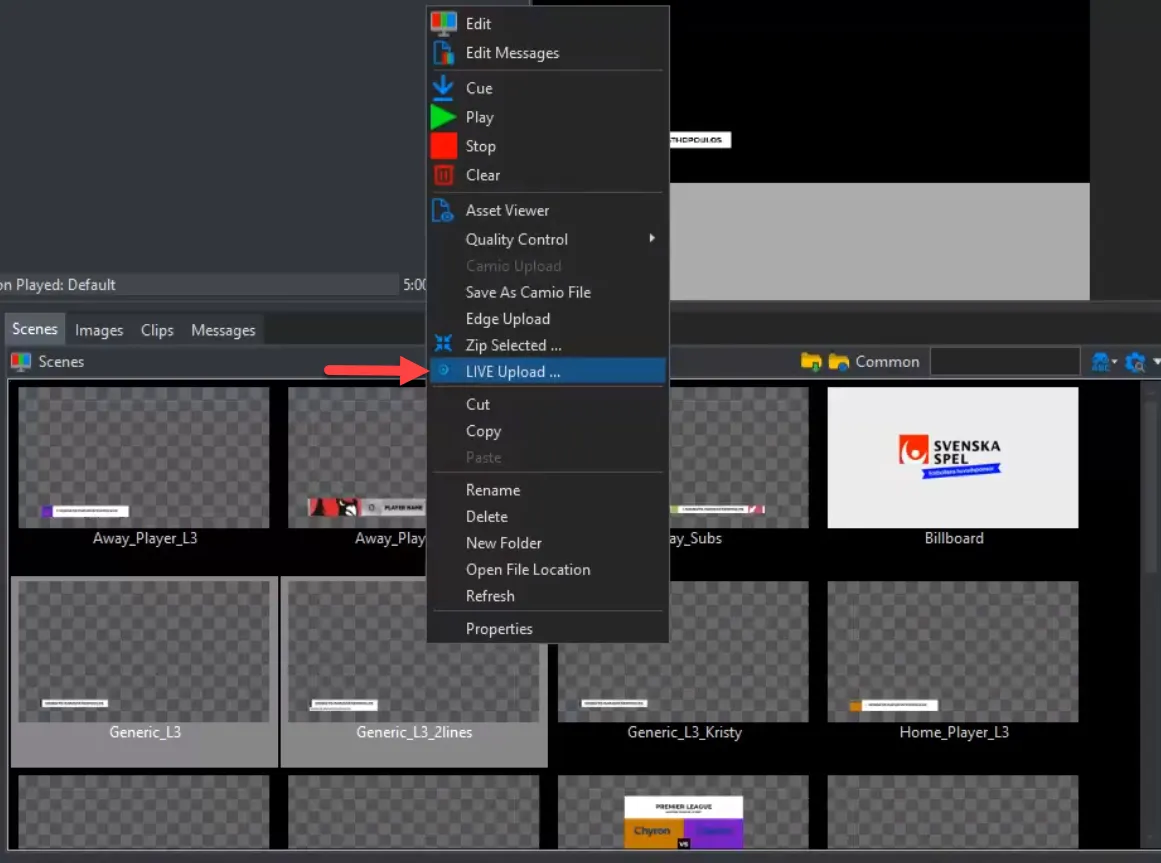
Now that LIVE Uploader is enabled, navigate the Scenes section in PRIME main screen.
- Select which assets to upload to LIVE.
- Right click on the selected items and click LIVE Uploader.
The LIVE Uploader files screen opens with PBX, CPF, PNG and Font files.
- Click the checkbox on the left side of each item to complete the upload.
Once selected, click the Upload Selected button.
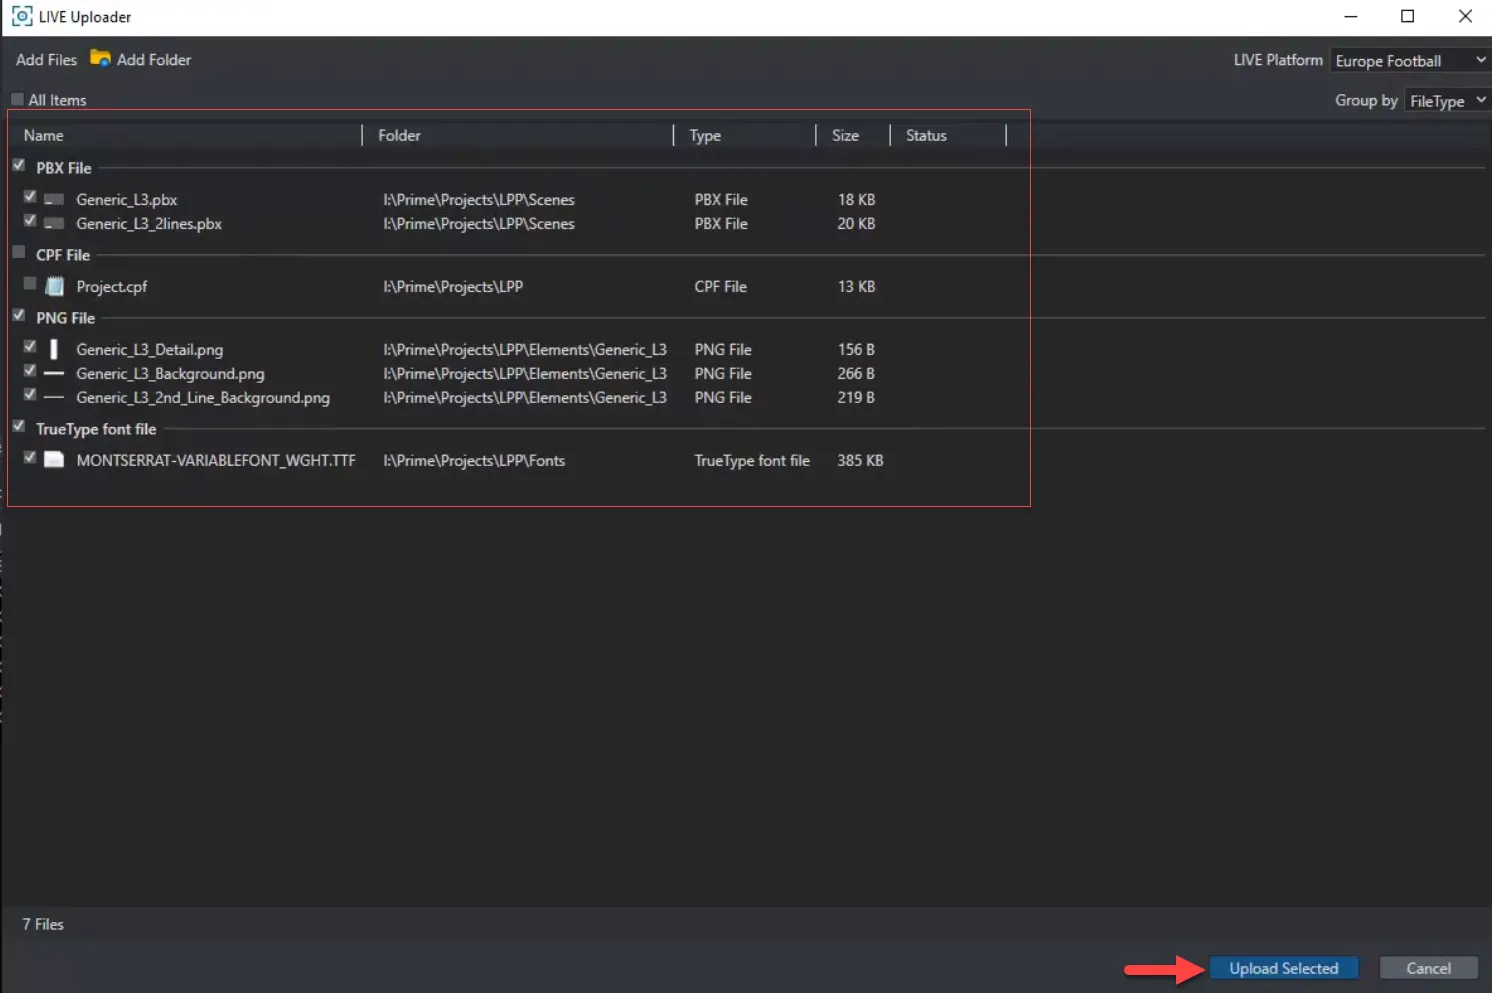
The status will change to Finished along with a green checkmark icon.
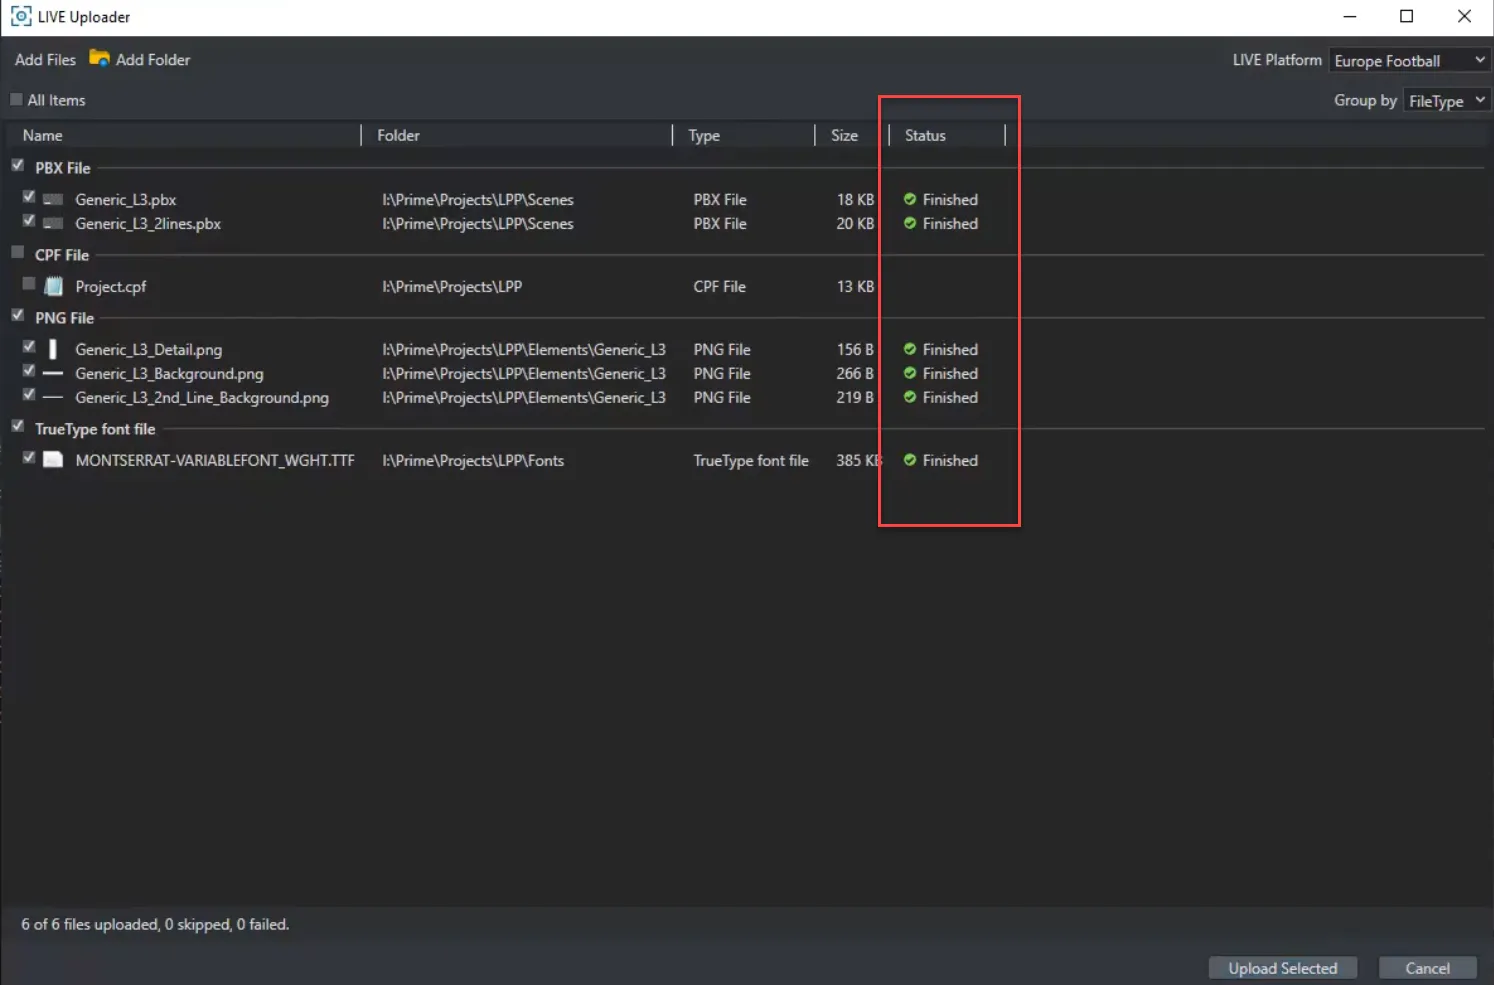
Well done! the upload is now complete and we can switch over to LIVE and put the assets into production.
Navigate to the Browser screen and click on Scenes to activate the uploaded assets.
The destination for your uploaded content is demo-us-1-assets-storage. You must have your own unique S3 bucket account.
Download the freeware for s3browser, click here https://s3browser.com/
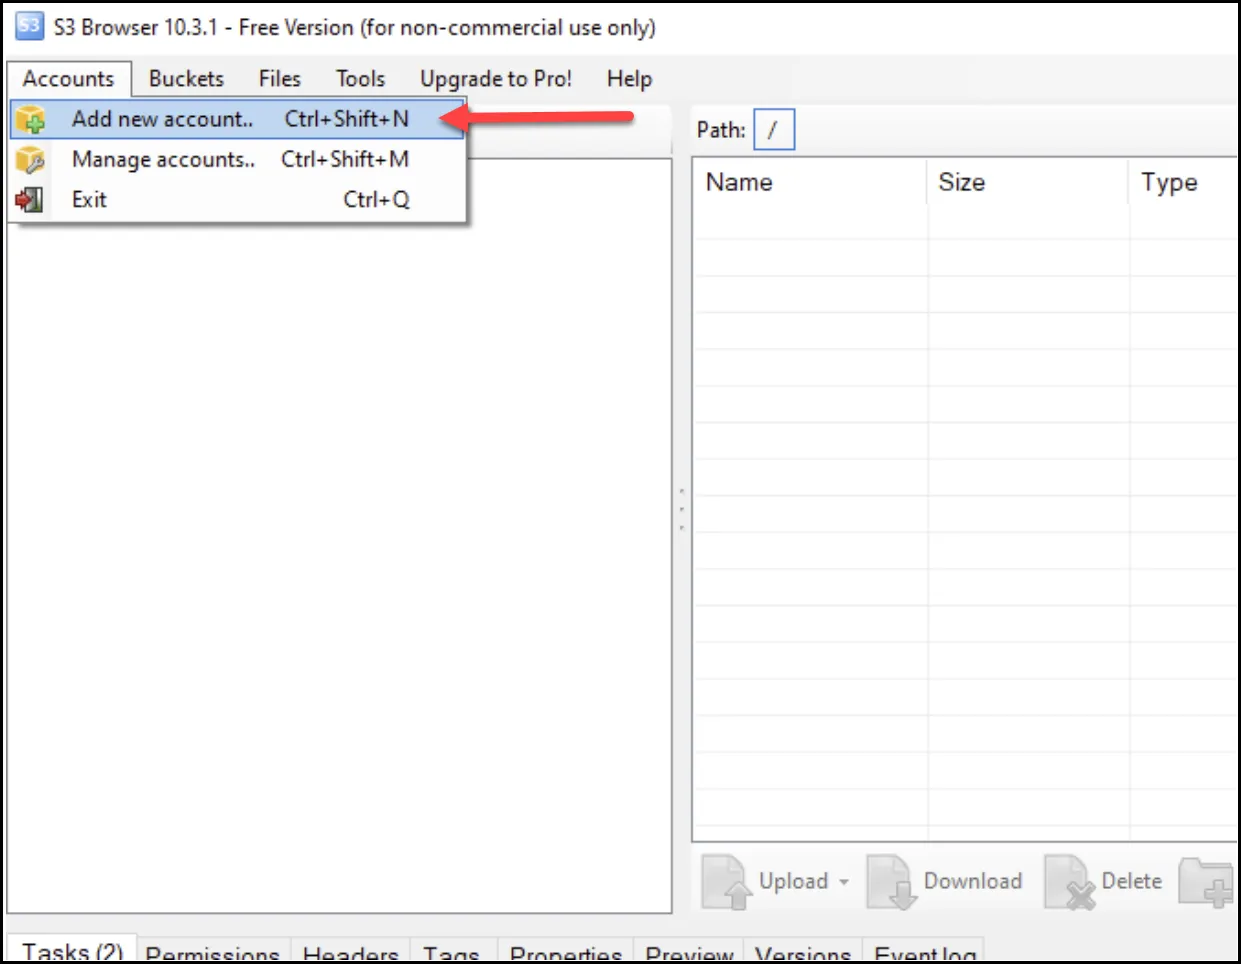
- Click Accounts tab on the main page.
- Click Add New Account.
- If LPP folder does not appear, contact your Chyron administrator.
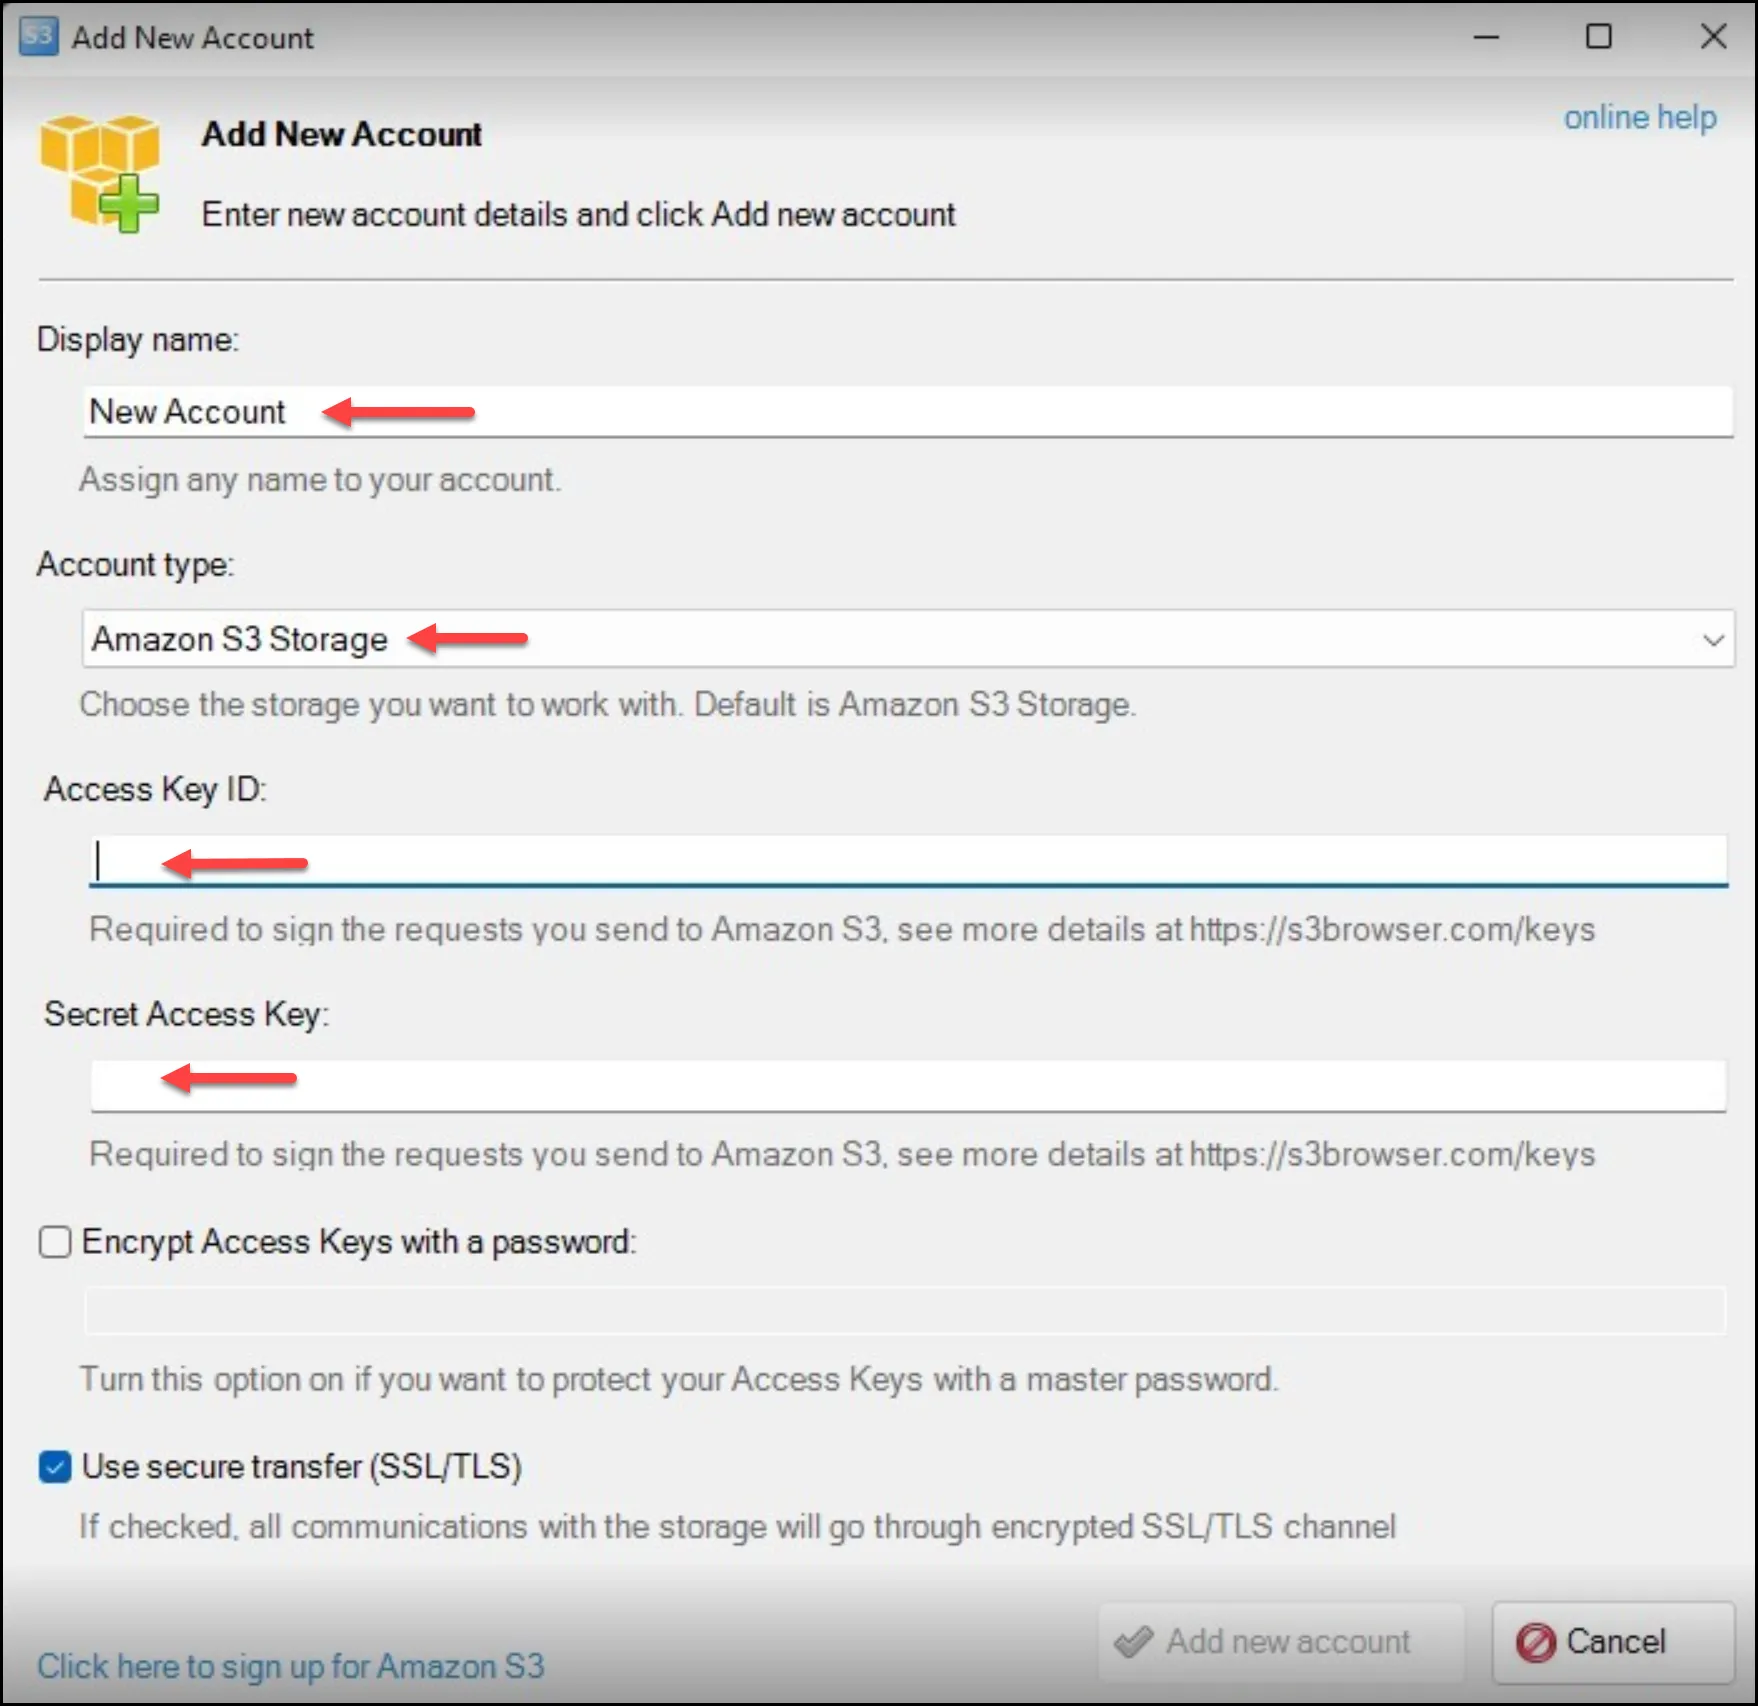
Enter a unique Display Name, Access Key ID and Secret Access code provided in your sign up confirmation, and select the Account Type: Amazon S3 Storage.
Click Add New Account button.
A dialog box appears, asking if you want to add an External Bucket.
- Click Yes.
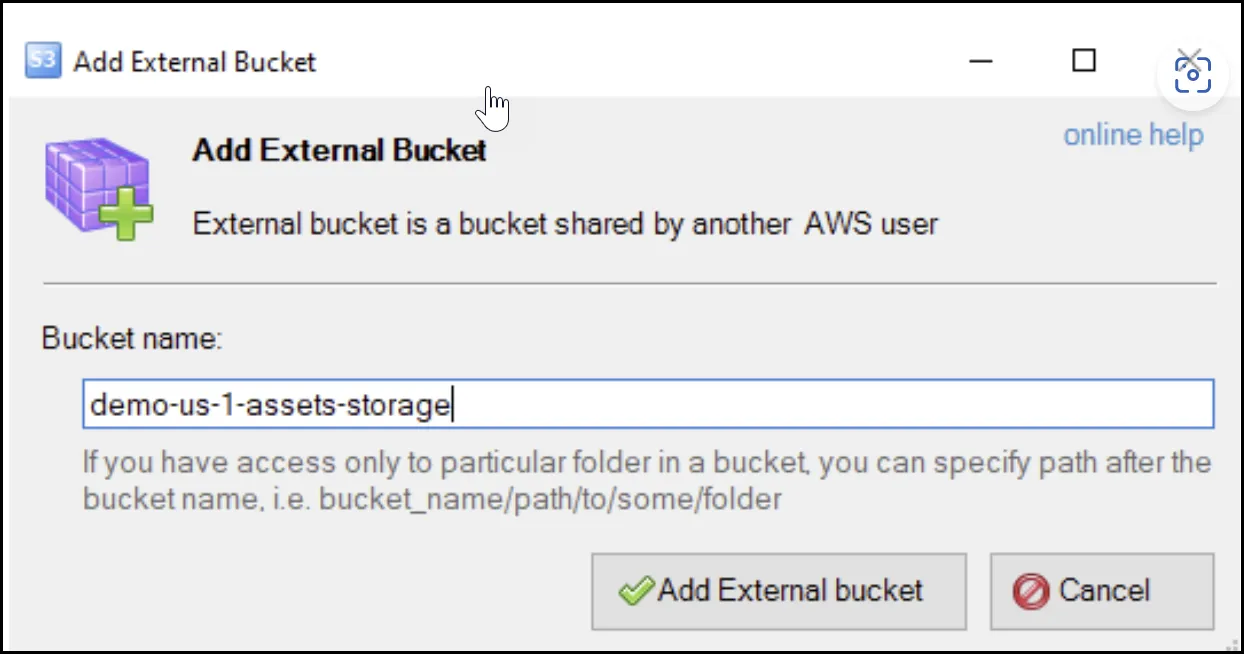
- The Add External Bucket dialog appears.
- Enter this name in the Bucket name field: demo-us-1-assets-storage.
- Click the Add External Bucket button, at the bottom of this dialog.
- Delete the default name and enter the bucket name in the field.
Now you can upload new content.
- Upload new content to the LPP folder.
Note: The LPP folder must match your PRIME Project directory.
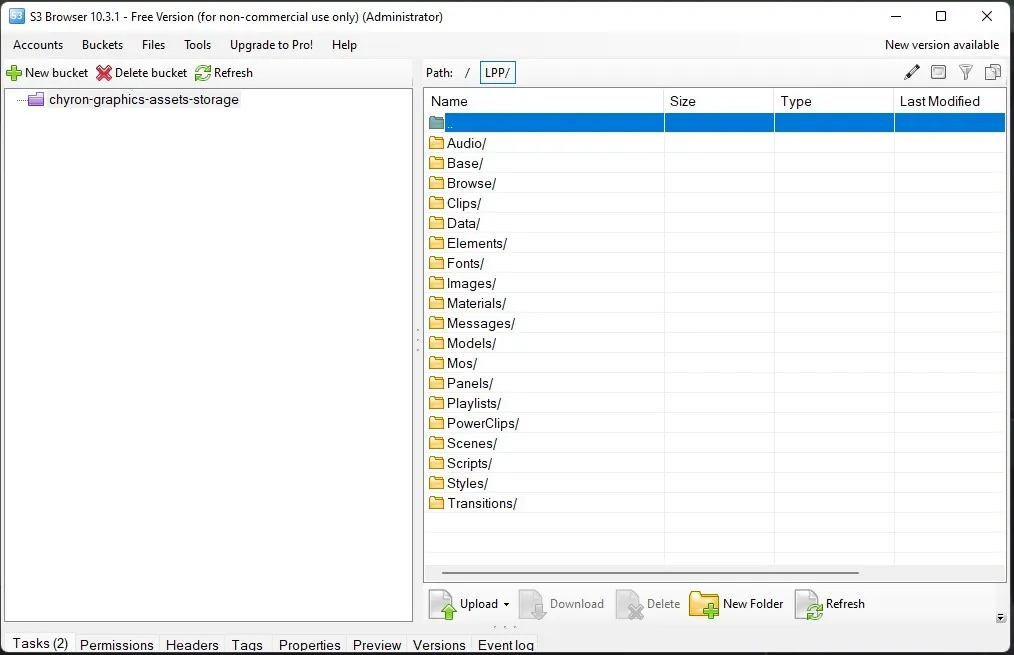
Confirm that all files are uploaded to S3 Browser, if any are missing, then:
- Drag and drop fonts from your local desktop window into the fonts directory within the S3 Browser.
- Drag and drop the images and folders from your Images folder into the S3 Browser.
- Drag and drop the scenes from your PRIME project folder into the S3 scenes folder.
- Drag and drop any custom transitions into the transitions folder.

